
When you try to open a USB drive, Windows warns you that it is write-protected? It is impossible to access the files, let alone delete their contents.
The most common cause: a write error has modified data in the USB drive's partition table, making it write-protected. In this case, it's impossible to access the USB drive, copy files to it, or delete files it contains. No problem, though; you just need to use the Windows registry.
To do this, press the key at the same time Windows And RIn the field that appears, type regedit and confirm.
Find the following key: HKEY_LOCAL_MACHINE\System\CurrentControlSet\Control\StorageDevicePolicies.
Click on it and look in the right-hand column and change the value of Writeprotect in 0 .
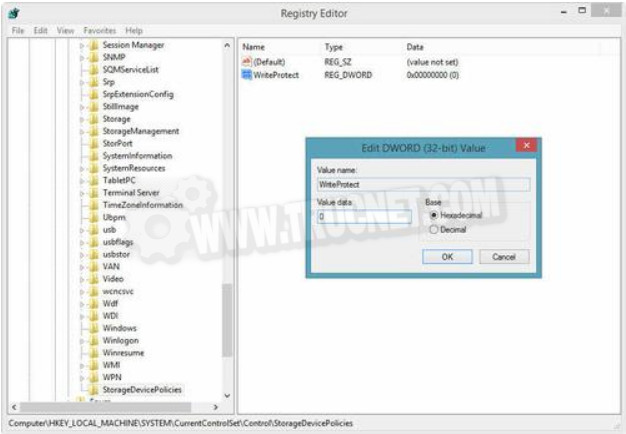
Then click the button OK to confirm. Finally, exit the registry editor and restart the computer.
There is another solution that allows you to format a write-protected key and which works well under Windows 7, 8 and Windows 10. This solution is based on the utility Diskpart from Windows.
Diskpart is a small command-line utility that allows disk management. It is integrated into most versions of Windows: XP, Seven, Win 8 and 10.
To use it, please follow these steps:
- First, launch a command prompt using the keys Windows And Rby typing cmd then confirm with the key Entrance.
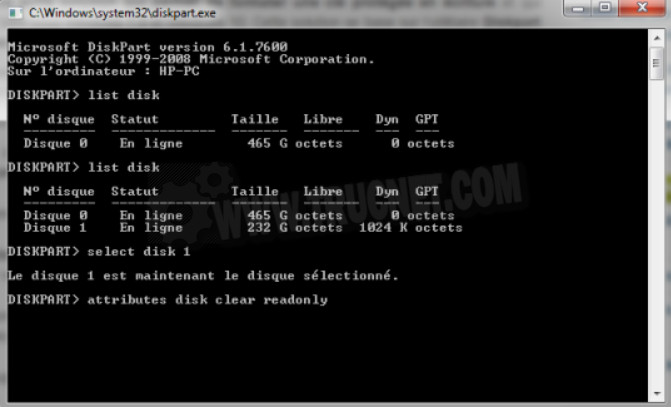
- Then type diskpart and confirm.
- Type list disk to get the list of disks present and look for the number of the USB key by referring to its capacity.
- Select the key by typing select disk X , Or X is the number you found, and confirm.
- To remove the read-only attribute, type attributes disk clear readonly and confirm.
- Finally, type exit and confirm to exit the program.
This article was updated on February 12, 2016