
A trick that will allow you to create a USB drive with multiple ISO files. This is very useful for mini laptops without a DVD drive/writer, but also for anyone who prefers to get rid of CDs and DVDs.
For those who don't know, an ISO file is an image of a disc (CD, DVD) in file form, created with burning software, with the extension .ISO.
To create a Multiboot USB key with several systems, you need to download the ISO files of the systems that we are going to put on the USB key, a USB key of about 8 GB, and a small software called: XBoot.
In my case, I'm going to put three ISO files that I frequently use onto a USB drive, but be aware that it's possible to use others or even more!
How to create a multiboot USB drive with XBoot?
Let's start with Download and launch XBootIf an error message appears, you will need to download and install the .NET FrameworkIf everything goes well, you should see the main interface.
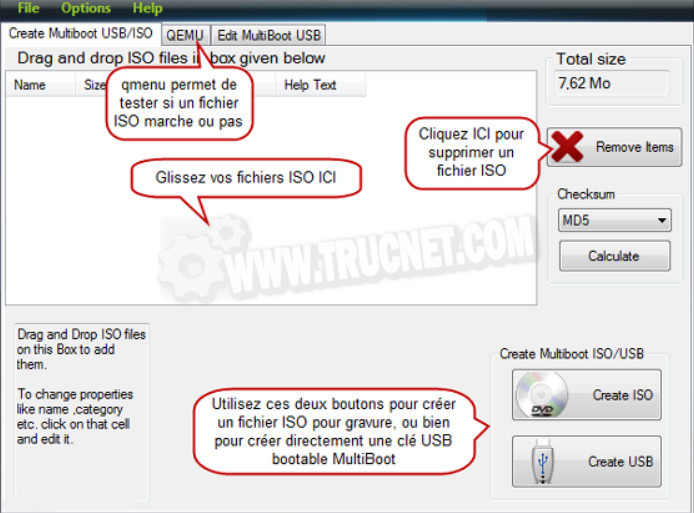
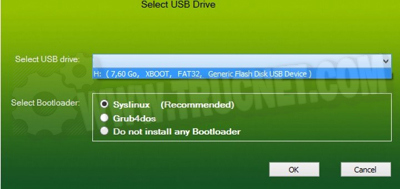
Once all your ISOs have been selected, simply plug in your blank USB drive and click on " Create USBSelect your device from the menu and leave the bootloader as default. Then let the software do its thing.
Xboot will then ask if you want to launch your creation virtually to see if everything works correctly.
Once your key is ready, you'll just need to boot from the USB drive to use it on a computer. Do Delete, F1, F2 or F12 (Depending on your motherboard model) Right after turning on the PC, enter the BIOS (Setup). Find the option Boot Sequence and change the order by putting the USB port first.
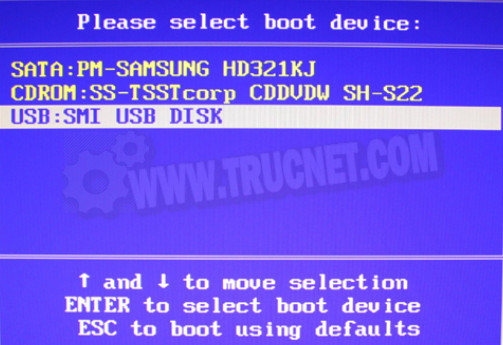
If everything goes well, you should see the following menu.
Boot from Hard Disk This allows you to return to the system installed on the hard drive. The other lines correspond to the ISOs you have integrated. Choose the ISO you want and press Enter.
This article was updated on February 23, 2016